There are many ways to filter water to remove impurities. The first steps should be understanding what you’re trying to remove and the intended use of this purified water.
For example, say you wanted to wash clothes but the water is muddy. You might simply let the water stand in a bucket for a while for the mud to settle or run the water through a simple filter to remove the dirt.
But, for drinking water we need to be much more careful. Some water may have bad organisms or chemicals in it. Our bodies can deal with small quantities of bad things, but constant daily use of contaminated water can make you very sick.
Today I’m going to talk about a type of filter intended for homes that have city or well water supplied under pressure. These filters improve the water a lot, removing chemicals and organisms, but your water should already be considered drinkable. These filters are not intended for severely contaminated water.
I just installed a basic “Prestige Reverse Osmosis” (RO) water filter system made by Geizer, a Russian water filter company. These are available direct from their website and also Ozon and AliExpress. You can probably find or order them through larger plumbing stores in your area.

Reverse Osmosis systems seem very complicated when you first look at them, but in reality they’re not that difficult to understand.
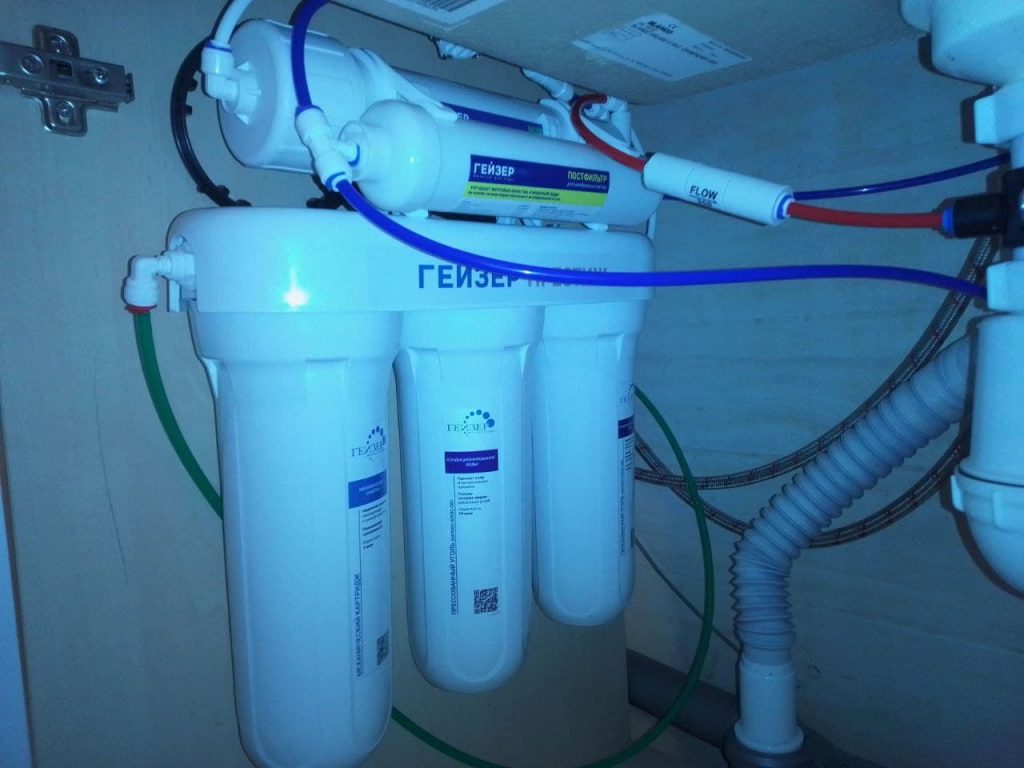
Along the bottom you see three round canisters, these contain three different types of filters.
Cold water from your existing water pipes enters on the left end of the bar that says гейзер престиж. From there it goes a “sediment filter” in the left-most canister. This just removes dirt and any other large items from the water. This filter will need to be replaced when it gets full of dirt. If your water is clear, then maybe only once per year. If the water is dirty you may have to replace it much more often. They are pretty cheap and can be found online and in any plumbing store. They may be made of a plastic foam as in the picture below, but may also be folded paper or string wrapped around a core. They all work pretty much the same, buy the cheapest ones you find.

If you have a lot of mud/dirt in your water you should have a large sediment filter installed for your whole house.

Next the clear water flows through a filter consisting of activated charcoal granules that the water has to pass over. This is in the middle canister. These absorb chemicals from the water along with any particles that got through the sediment filter. Typically you would change these once a year unless your water has a lot of chlorine or other chemicals in it. Activated charcoal is different from charcoal you would use for cooking.
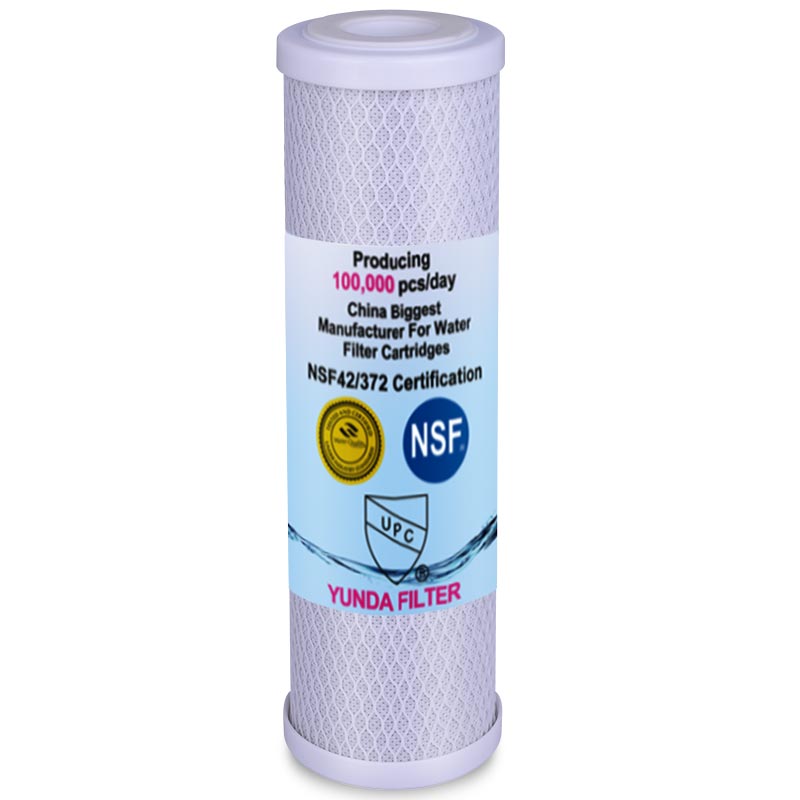
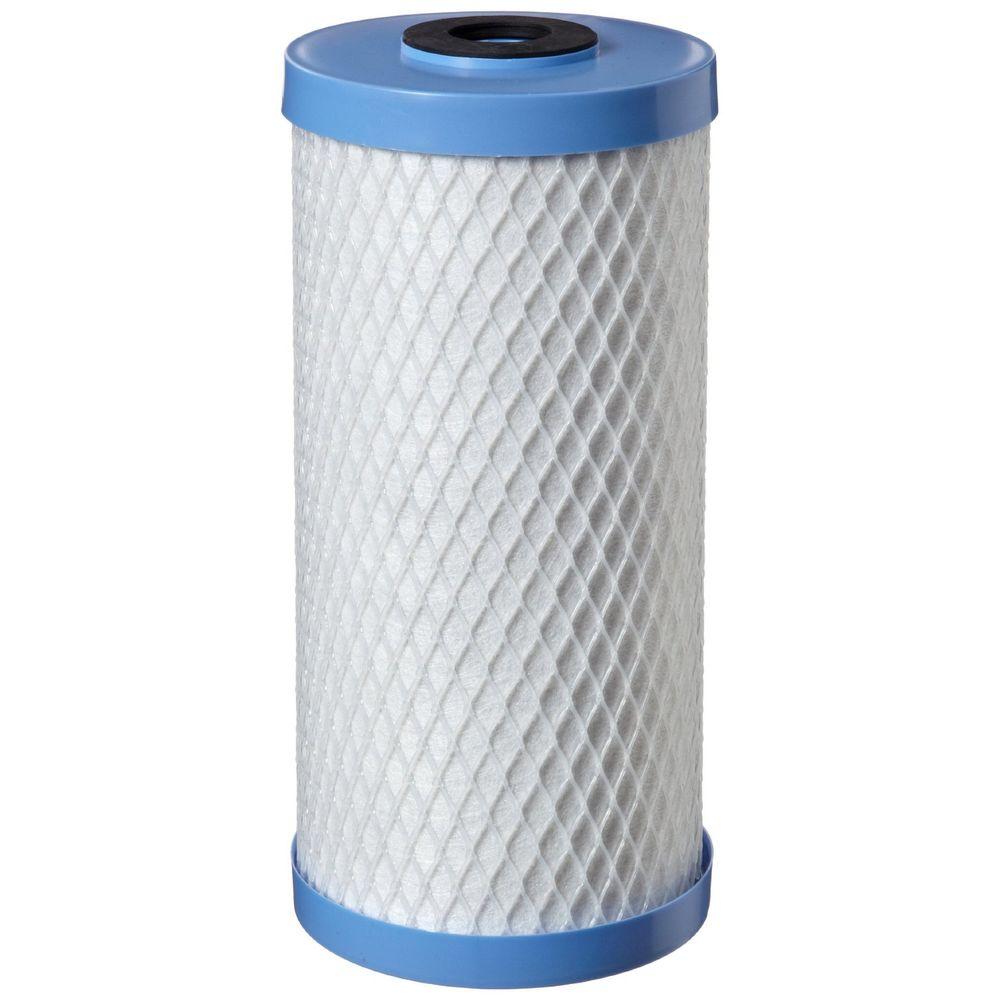
Ok, now our water has the dirt removed and many easy to remove chemicals have been absorbed by the charcoal. Next the water goes through a carbon block filter in the canister on the right. This filter is a solid block of activated charcoal wrapped with a fabric sleeve. It is very good at removing things like chlorine but would be quickly clogged if there’s any dirt in the water. That’s why the other two filters in the canisters are needed. These would also typically be replaced once a year.
Depending on the amount of cleaning you want, you could stop here and have pretty good water. We’re going to go further and will remove almost everything from the water.
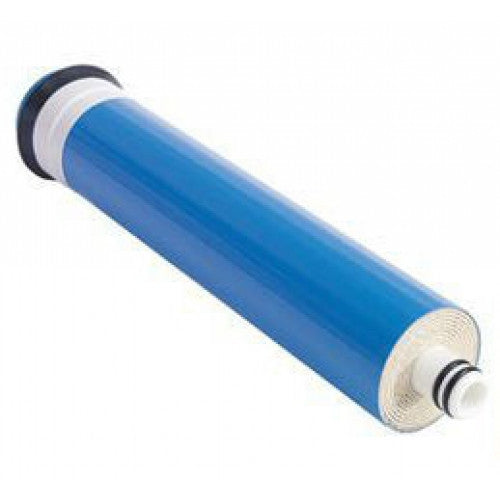
On top of the Geizer filter assembly you see two canisters laying down. The larger of the two is where the “magic” happens. This is the Reverse Osmosis filter.
You should be asking right now, “What is Reverse Osmosis?” Lets start with Osmosis, this is a process that happens all the time in every plant, animal, and our bodies. If you take a half glass of very salty water and add half a glass of clean water, the water will all quickly mix and will all have the same amount of salt in it. Nature doesn’t like things to be concentrated in one place and rare in another, everything that can tends to spread out and mix.
Now, what would happen if there was some sort of barrier that water could pass through but salt can’t? If we put clean water on one side and salty water on the other. It would look something like this:
/GettyImages-112706652-5a0dac79ec2f640036c5cabc.jpg)
The small blue balls are water molecules, the large red ones are salt (or other things like bacteria), and the black line is a barrier filled with very small holes.
Nature notices there are a LOT more blue balls on the left than on the right, so the blue balls will start moving right and will keep going until both sides have the same level of saltiness. Since there are more red balls on the right, a lot of the blue balls will need to move over. The water level on the left will fall and the level on the right will rise.
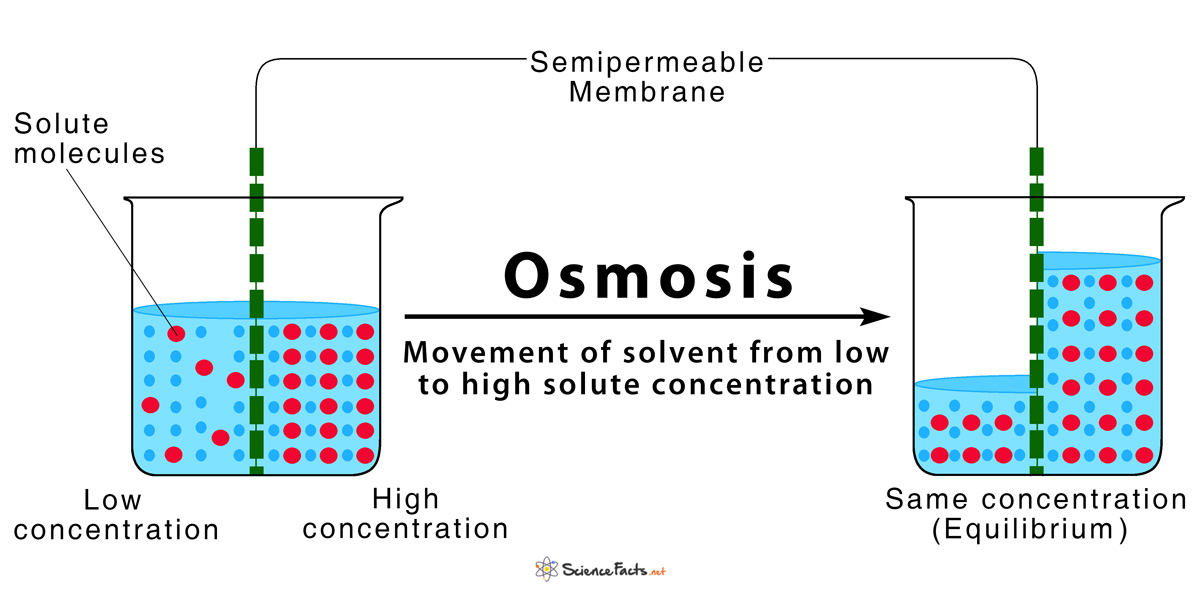
You can see there can be quite an amazing difference in water level! If there’s a lot of salt on the right then the left hand side will become almost empty, but as the water on the right gets higher the pressure is too great for any more water to flow from left to right so things will stop there. Even if the left side still has mostly pure water, the blue balls can’t fight against the pressure.
If you were now to remove all of the water from the left side, what do you think would happen? The pressure on the right would push some of the water (blue balls) through the barrier and back to the left side!
But, the water on the left would now be pure! None of the red balls could fit through the holes so you have a small amount of pure water gathered on the left.
THIS is Reverse Osmosis.
Ok, so now we need to make this process more useful so we can get a glass of pure water quickly. How do you think we’d do that?
Press down on the salty water on the right, the increased pressure will force the water balls through the barrier faster.
As we keep pushing more and more water moves to the left leaving very salty water on the right. So, we dump that out and replace it with some more regular water, press and we get even more pure water on the left.
Our next task is to figure out how to do this without having to stand there filling, pressing, dumping, and repeating for a long time to just get a glass of water.
The way we do this is to use the water pressure in your existing water pipes and then continuously discard the salty water.
The picture below shows what inside the RO membrane cartridge. The barrier with the holes is layered with a plastic mesh and plastic sheets to make a very wide water container. This is then rolled up and stuffed into the tube. The incoming water enters at the left end (“Raw Water”) and fills the space on one side of the barrier membrane. The pressure causes pure water to slowly go through and collect in the space on the other side (“Permeate”, the pure water that has passed through the membrane).

What to do about the salt and other left-over stuff? There’s a drain on the right hand side that lets a trickle of Waste Water out, this goes down your sink drain into the sewer.
The clean water (Permeate) is collected in a tank. When the tank is full, an automatic valve turns the system off to wait until you need more water.
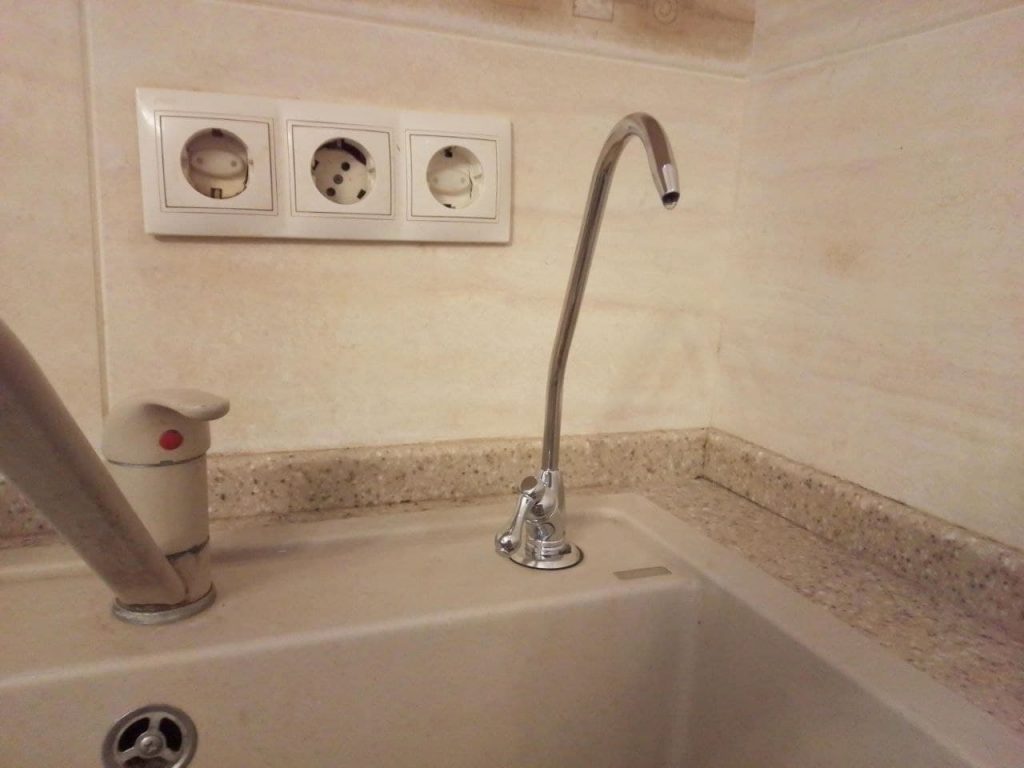
The water that collects in the tank connects to a small extra faucet on your sink. You use this one for the pure water.
You point and say “there’s one more small canister on top”. Yes, this is more granulated charcoal just to remove any small amount of flavor that came from the membrane filter. It’s not really needed. I replace ours once a year when I replace the other filters.
The RO membrane cartridge should be good for several years.
How to tell when to change cartridges
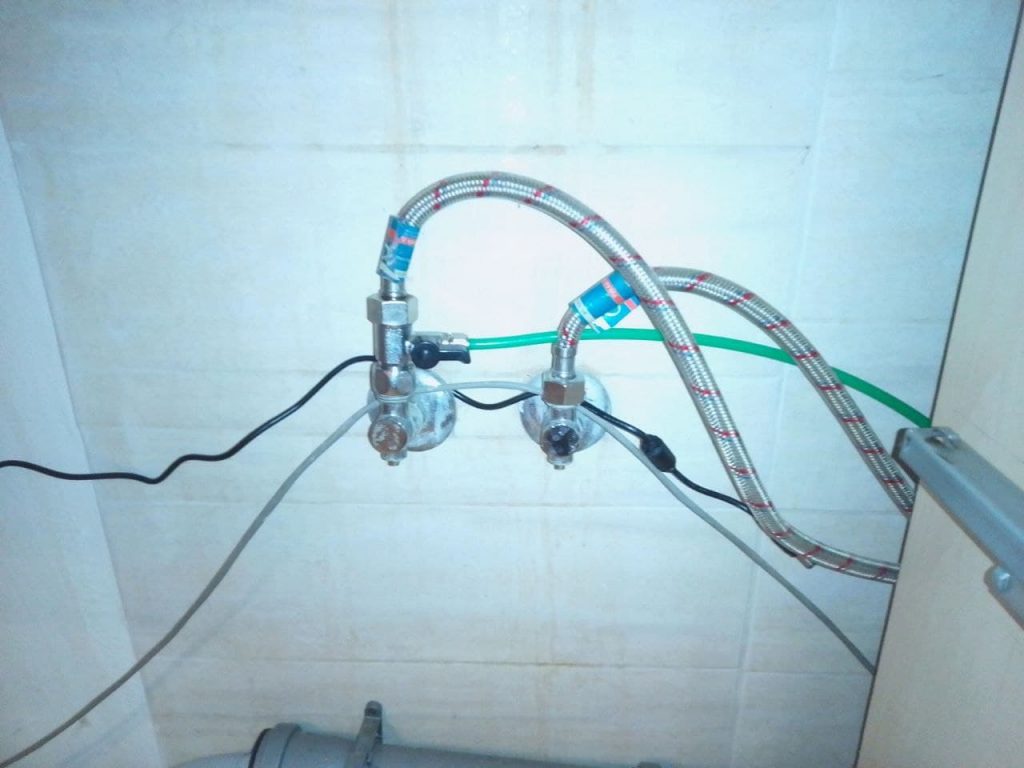
I use two pressure gages, one on the incoming house water and one right after the carbon block filter. If the pressure between the two gauges gets to be too high, it is time to change the sediment filter. If this doesn’t solve the problem, then also change the charcoal and carbon block filters.
As for the membrane cartridge, I test the water from time to time with a TDS meter.

The TDS reading for the pure water should be no more than 10% of the reading for your normal house water. A reading of under 20 is typical for RO filtered water. This means it didn’t take EVERYTHING out, so don’t assume this will completely protect you from disease and other chemicals. But a 90% reduction in these things certainly will help.
The actual installation
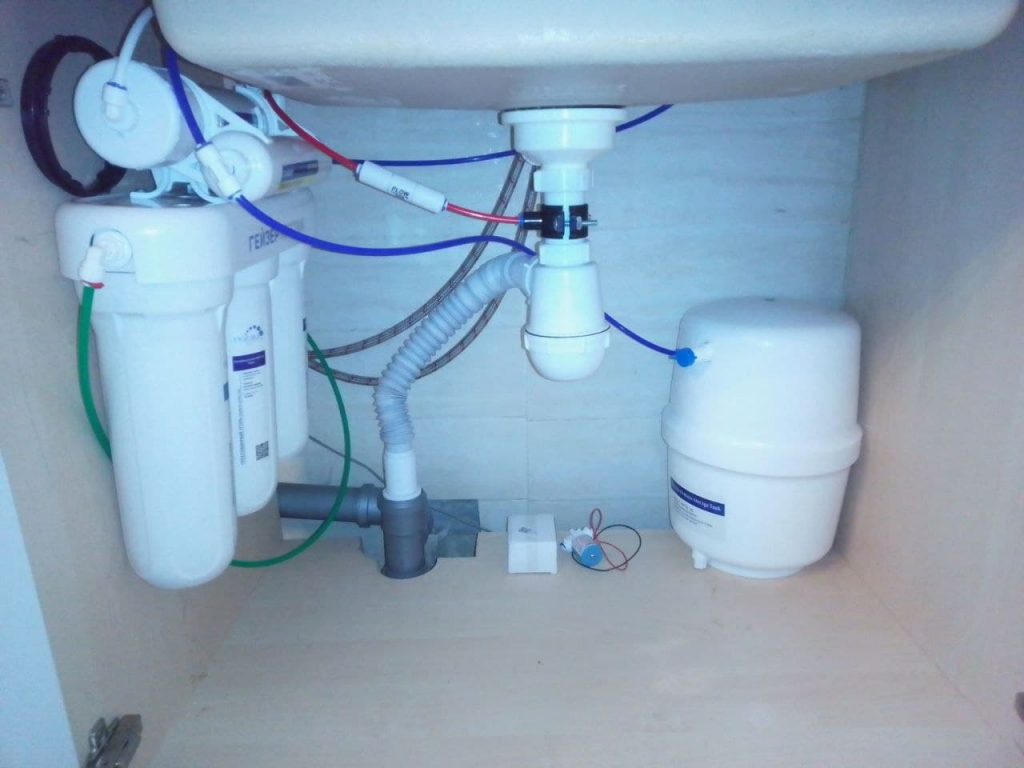
Here’s pictures of the installation I did.
The green tube brings in cold water from the house plumbing. Hard to see, but above the RO membrane canister is the automatic shutoff valve hidden alongside the sink. The black thing with teeth is a wrench used to open the canisters. the blue tube on the left carries pure water from the RO cartridge to the storage tank on the right side in the second picture down. The red tube carries the waste water through a small white valve that limits the flow. It then goes to the sink drain using the black adapter.
The silver faucet is the pure water faucet that was added to the sink.
That’s it for the basic RO filter system. Feel free to ask questions!
I have designed a modification that’s not shown in the above pictures, but it makes the system more efficient. I will show that in another posting.
2 responses to “RO Water Filters”
Jerry, it is always so exciting to read about
very useful and complicated devices .You have explained the process of filtering water in in simple words!
I”m so happy this water filter was installed in my house.Thanks a lot!
Dear students, welcome to come to my house and drink a cup of tea made of such crystal and clean water!
Glad to help, I’m available to help anyone who needs it. Locally in person, remotely by E-mail.